LAGOS RUG LOGO
![]()
![]()
![]()
![]()

What is LAG-RUG-DASH
LAG-RUG-DASH uses Flexdashboard and Shiny, which allow for rapid web application development as dashboard by capitalising on the usage of R-markdowns. This helps to attain the final stage of the Data Science workflow or pipeline which is communication of analysed data.
Dependecies
- rmarkdown
- httr
- scales
- flexdashboard
- shiny
- DT
- plotly
- naniar
- devtools
Getting Started
To install LAG-RUG-DASH from source you need Rstudio and R lang 3.4.4> in order to get started. Run the following in command prompt
git clone https://github.com/tosi-n/LAG-RUG-DASH.git
cd LAG-RUG-DASH
then open the project folder LAG-RUG-DASH from Rstudio
File Paths
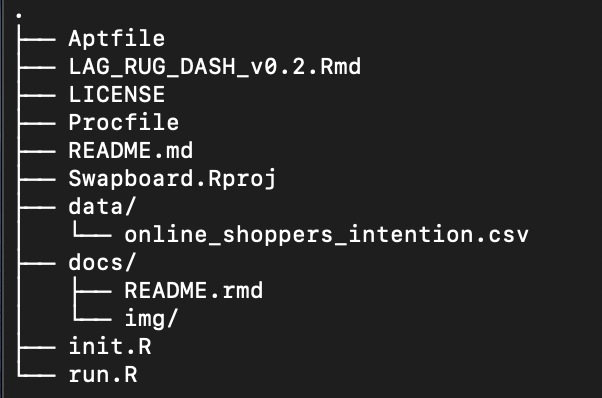
Directory
Alternatively
To install LAG-RUG-DASH from google drive link, after download Rstudio and R lang 3.4.4>. Download all from link below
https://drive.google.com/drive/folders/1jOiaKovigCXNB16HI5v9SJQIkwBm-bR4?usp=sharing

then open the project folder LAG-RUG-DASH from Rstudio
Install Dependencies
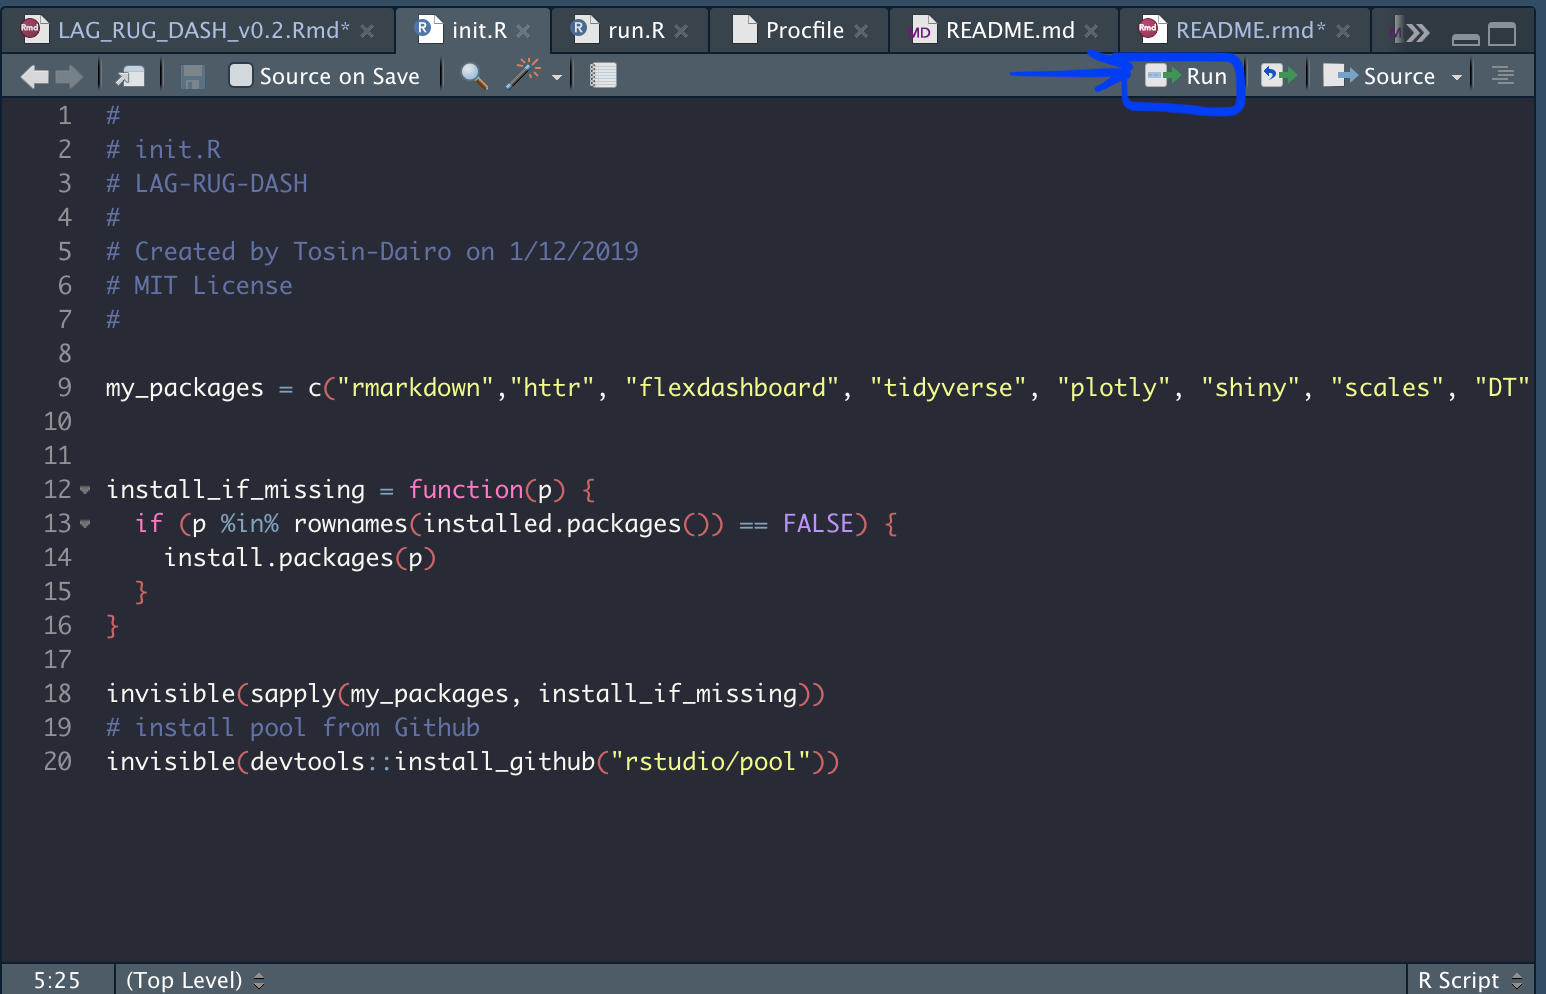
In Rstudio, install package dependencies using the init.r file. Open init.r and click run to install deependencies on Rstudio.
Design and Layout
Layout operates in 4 TIERS based on client or user requirements
- Sidebar layout (Input {.sidebar}) SB
- Tab layout T(Tab-name)(======) T
- Rows and Columns (Row{}) R
- Widgets / Components C
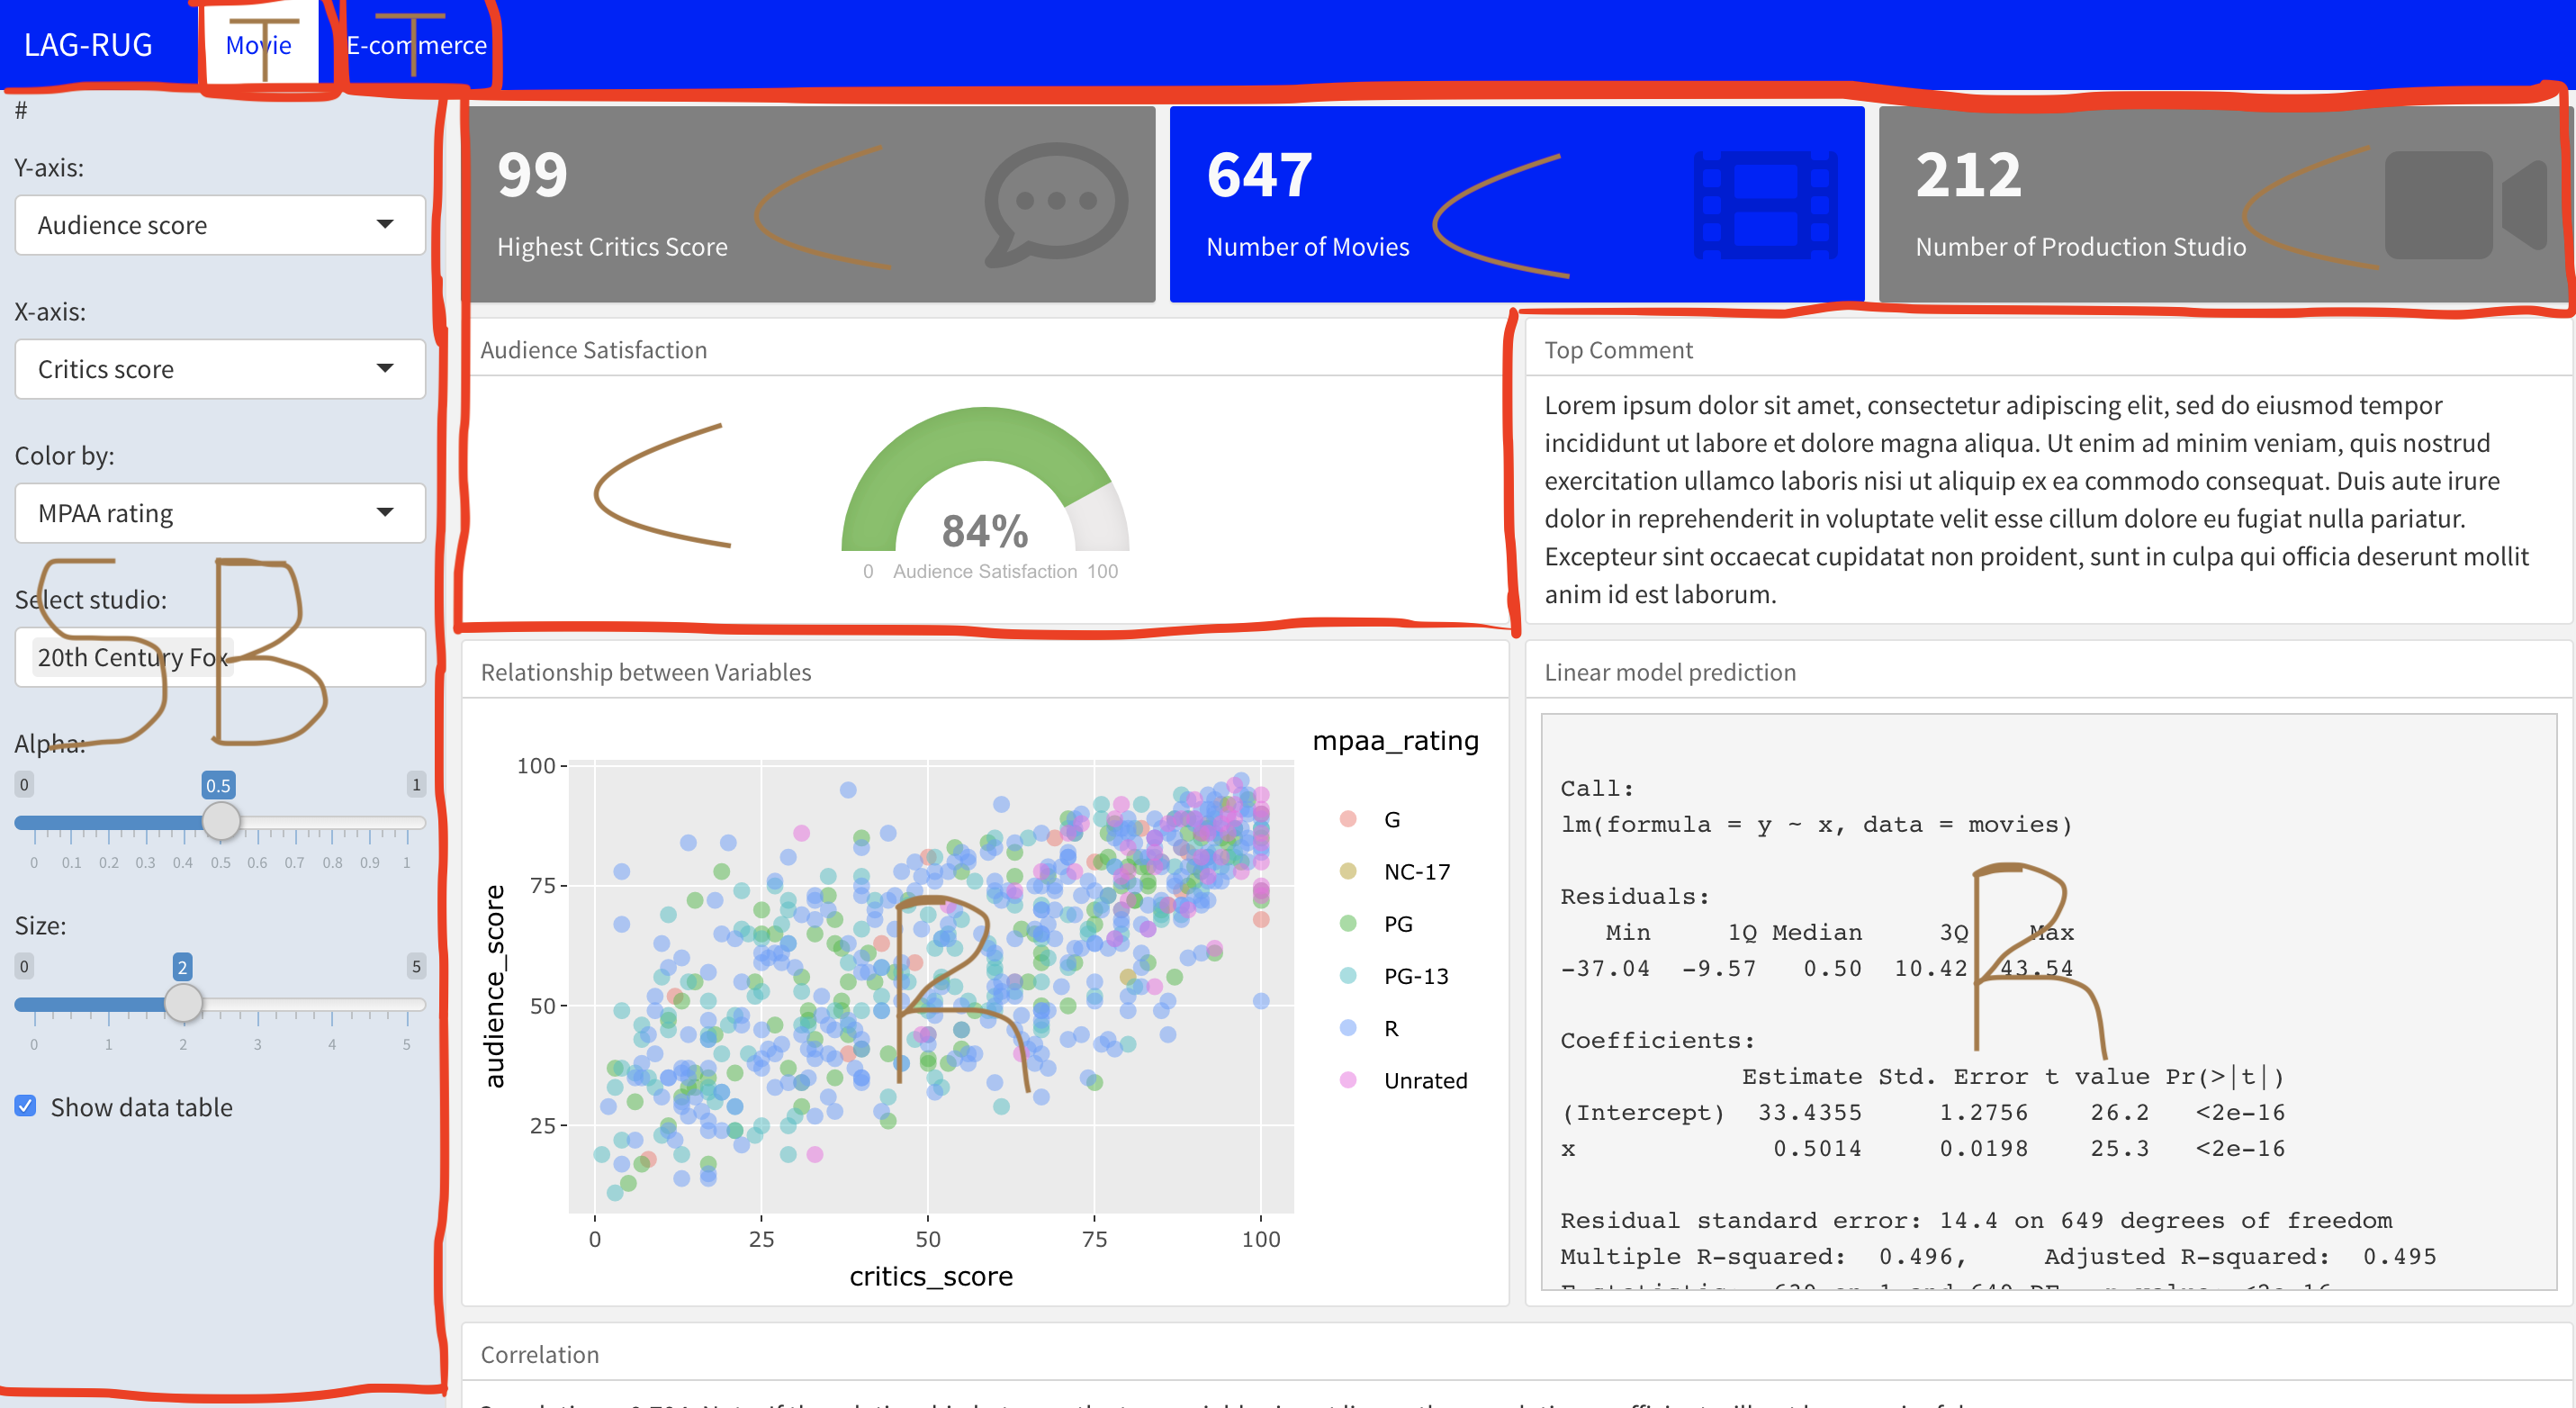 Edit code in LAG_RUG_DASH_v0.2.Rmd to fit your requirement.
Note: sidebar is used for creating dashboard input data or feature to be implemented on the entire dashboard.
Hosting on Heroku
In order to have our LAG-RUG-DASH Livee on heroku, follow the below listed requirements and process.
init.R
Procfile
Aptfile
run.R
heroku-buildpack-r
As indicated earlier, the init.R file contains packages to be installed on heroku server. Heroku dynos uses a contanerized feature to host application. For heroku dynos to know the kind of application we are install we need to set Procfile as web feature so that heroku know our application is a web application. Procfile also carries information about the file root directory and the console type to use.
web: env fakechroot fakeroot chroot /app/.root /bin/sh -c 'cd /app && /usr/bin/R -f /app/run.R --gui-none --no-save'As seen above the Procfile requires a set of Linux console environment in order for it to operate. Using the Aptfile, we tell heroku to install the below listed Linux console in order for heroku to run R and dashboard packages in the server.
libpq-dev
libxml2-dev
gsl-bin
libgsl0-dev
With the above done, R shiny is the runtime set for the dashboard to operate on so therefore, a run.R file is needed for the dashboard rendering. The run.R file is used to:
- Set port for heroku to listen to
- Set the default working directory
- Run the dashboard on the server heroku creates
port <- Sys.getenv('PORT')

setwd('/app')

rmarkdown::run(
  'LAG_RUG_DASH_v0.2.Rmd'
  , shiny_args = list(
    host = '0.0.0.0',
    port = as.numeric(port)
  )
)
git push Heroku Deploy
Create heroku account, then go to heroku dashboard and create application by clicking on New. Set application name and set server location as US or Europe then create.
After creating a heroku account and application, go to Rstudio terminal run the following commands:
heroku login

git init

git add .

git commit -m "commit message"

heroku git:remote -a app-name

heroku buildpacks:add http://github.com/virtualstaticvoid/heroku-buildpack-r.git#heroku-16

heroku stack:set heroku-16

git push heroku master
Check deployment success using command in Rstudio terminal:
heroku logs --tailUpdate Deployed Dashboard
For constant update to dashboard on a live heroku server, go to Rstudio terminal run the following commands:
heroku login

git add .

git commit -m "commit message"

heroku git:remote -a app-name

git push heroku master